Once you install the Transporter Sync app, all users in your Eloqua instance can access it.
Move assets between Oracle Eloqua instances with a single click. The app automatically calculates asset dependencies and includes them in the migration. You can sync individual assets or entire campaigns—the choice is yours.
Transporter Sync can sync any Oracle Eloqua asset to any instance, based on our supported assets list.
Launching Transporter Sync
Here's how to launch the Transporter Sync application as an end user:
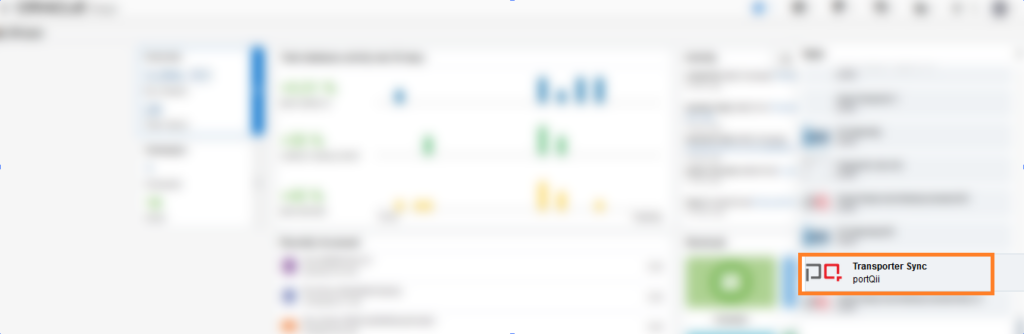
- After logging into your Oracle Eloqua instance, click the cloud icon and select "Transporter Sync" by portQii.
The application loads in the menu app:
From the home page, you can:
- Start a new sync
- View recently synced assets
How to Sync Assets Between Instances
Transporter Sync is context-aware. Where you launch it from within Eloqua determines what you see first. Launch from the Eloqua home page to see recent syncs. Launch directly from a campaign to sync that campaign with one click instead of searching for it.
Syncing Assets from Home Page
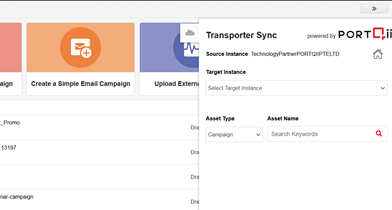
Use this method when launching from outside a specific asset (like the Eloqua home page). This approach works well for asset types that don't support direct app launches—like Custom Data Objects.
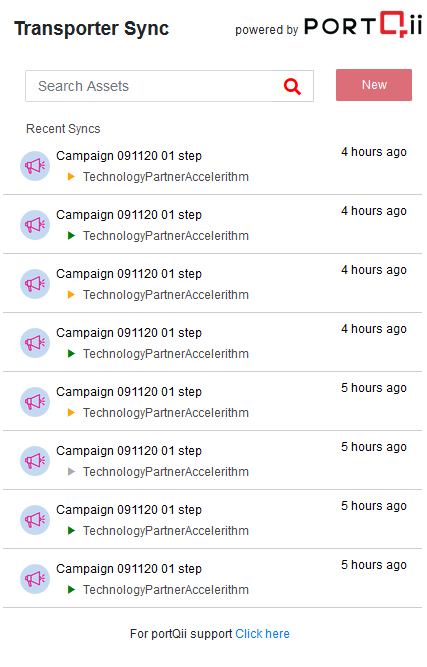
- Opening the Sync app from Eloqua's home page shows a page where you can click the start button to sync your desired asset. The search box helps you find recently synced assets from this Eloqua instance. Once you start using the app, recent synced items appear here for quick access.
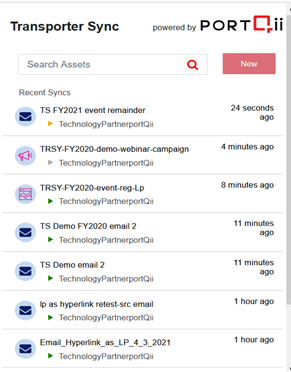
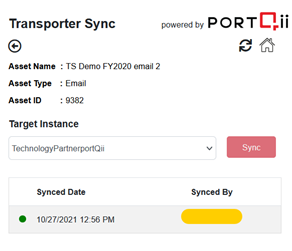
- To see complete details on any recent sync item, click it. This opens a details page with the asset name, type, source asset ID, target instance, sync date and time, and who performed the sync.
- To sync a new asset, click the start button on the Sync home page. This loads the sync interface:
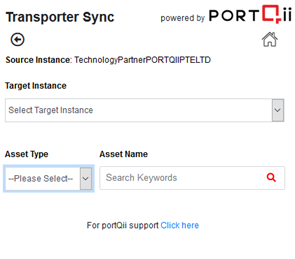
- Select the target instance where the synced asset will be created (or updated if it already exists)
- Select the asset type and search for the asset name
- The application returns search results and displays them
- Click the Sync button to start syncing the desired asset
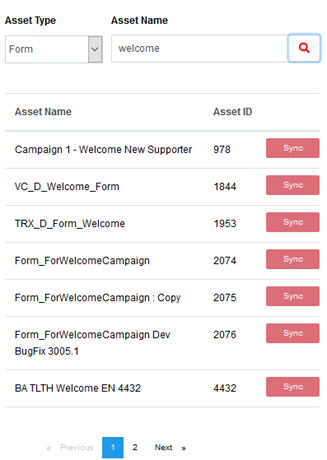
Alternatively, click on an asset in the search results to go to its asset page, where you can also initiate the sync:
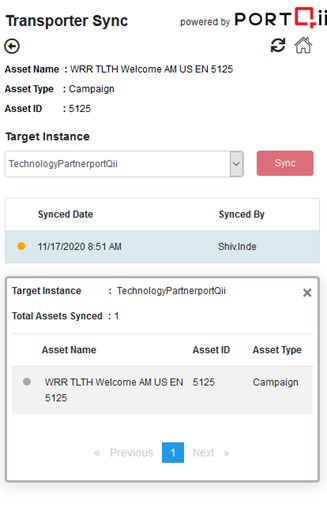
Once you start a sync, you'll see a confirmation message. To check the current sync status, click the refresh icon to reload the page with the latest information. The home icon takes you back to recent syncs.
The asset page shows sync history. Click any row to see sync details listing all child assets that synced with the parent asset. Click any parent or child asset row to view the asset status and link to the target asset.
Sync Status and What They Mean
Transporter Sync uses color-coded status indicators for each stage of the sync process:
- Yellow dot: Sync in progress
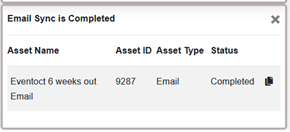
- Green dot: Completed successfully—the parent and all child assets deployed to the target instance without errors
- Grey dot: Action required—some assets failed to deploy completely due to unsupported assets
For example, if an email or its child assets contain cloud content, the asset with cloud content gets "Action required" status, and the overall sync status becomes "Action required." You'll need to log into the target instance and manually add the missing cloud content to that asset.
Syncing Assets from Eloqua Asset Page
You can open Transporter Sync from any Eloqua asset page. When you know the asset type you want to sync, launch Transporter Sync from that asset page in Eloqua. For example, opening Transporter Sync from the Eloqua campaigns page loads with the asset type pre-selected as "Campaign" (this selection cannot be changed).
This works for any Eloqua asset page—emails, landing pages, etc. The sync page opens with the asset type set to match the Eloqua page you're on. From here, you can select the target instance, search for your asset, and start syncing, or click the asset name to go to its details page first.
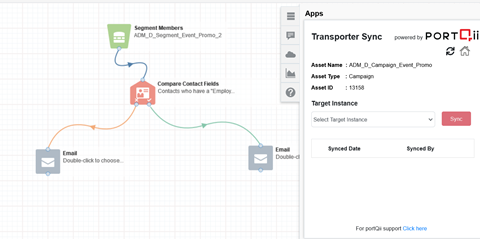
Syncing Assets from Inside an Eloqua Asset
Transporter Sync lets you sync directly from inside an Eloqua asset, eliminating the need to search from the home page. Simply select the target instance and click Sync to start the process. Sync details appear on the same page.
Every Transporter Sync page includes a PortQii Support link for instant help with any application concerns.
How Transporter Sync Works
Transporter Sync follows specific rules to ensure your assets remain intact and existing assets in the target instance aren't modified unless you explicitly initiate their sync. When you sync an asset, related child assets also sync to complete the asset in the target instance. Transporter Sync only syncs child assets that don't exist in the target instance—it won't update existing child assets without explicit permission.
- Transporter Sync creates the parent asset in the same folder name as the source instance if it doesn't find the folder and asset in the target. If it finds the asset in the target folder, the sync updates the target asset.
- Transporter Sync won't update child assets that are automatically added by the application if they already exist in the target instance (folder names of child assets must match).
- The application creates child assets in the target instance if they don't exist in the same folder as the source.
Important Note
If the parent asset already exists in the target instance, no validation checks which asset was modified more recently. The application replaces the target asset with the source version. Take extra care when you have active assets in the target instance with matching folder and asset names as the source.
Special Case
Email groups associated with emails sync along with the email but won't be linked to the synced email in the target. This gives you the freedom to add the email to your desired email group in the target instance.
Terminologies Used in Transporter Sync
Parent asset: Main asset selected by you to sync
Child asset: Assets that are part of the main asset and sync to the target along with the main asset